How Far Should Flashing Lay On Roof

How To Roof A House Diy Roofing Roofing Home Construction
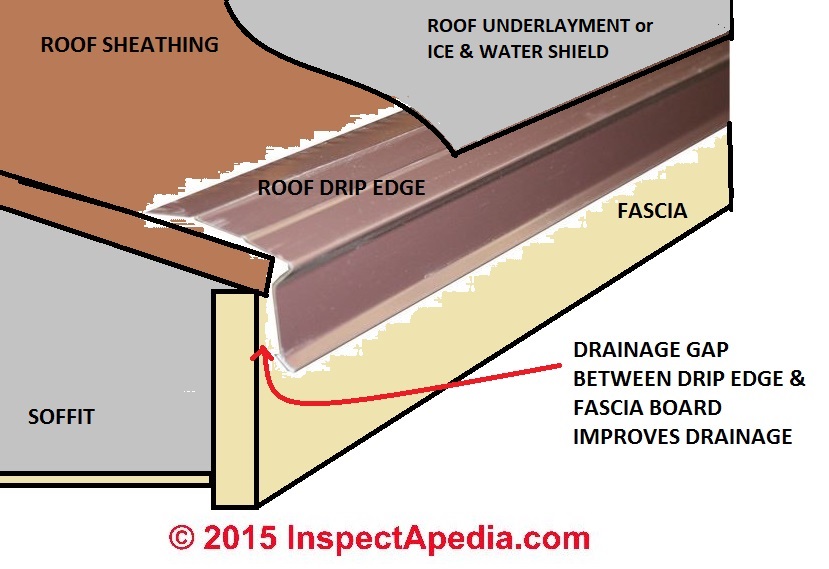
Roof Drip Edge Flashing Requirements Recommendations

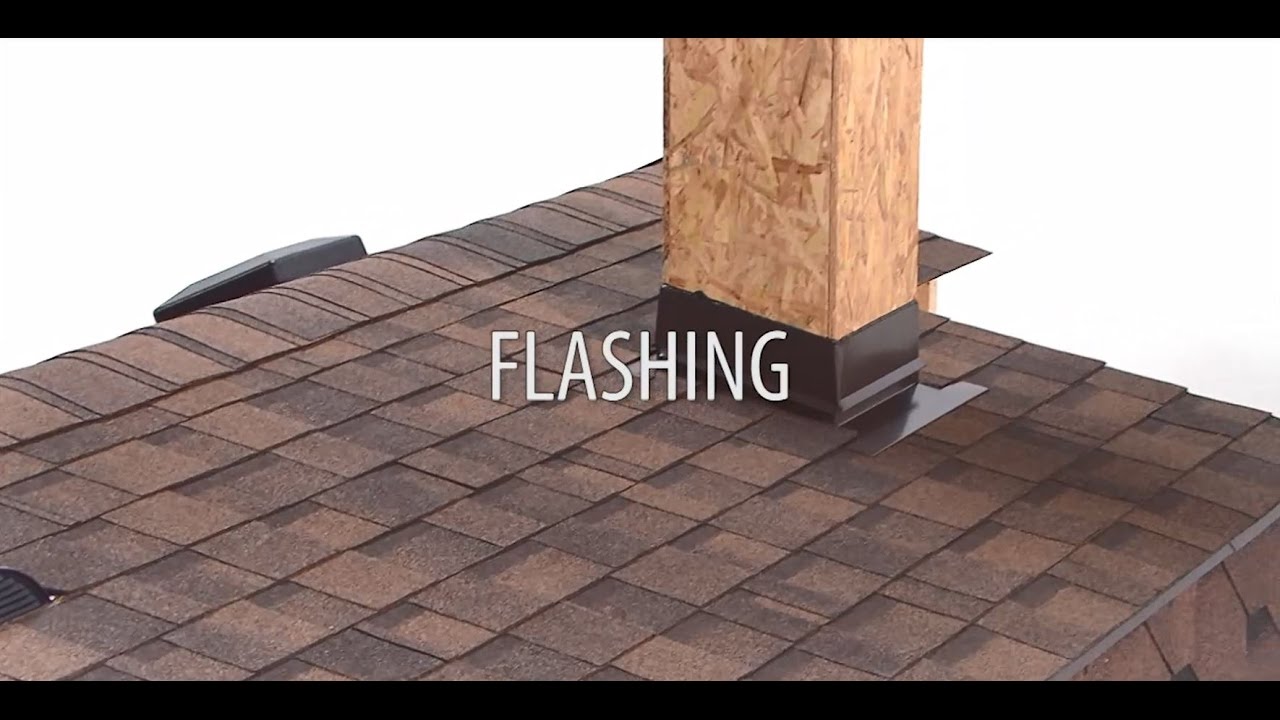
The Importance Of Roof Flashing Infinite Roofing Blog
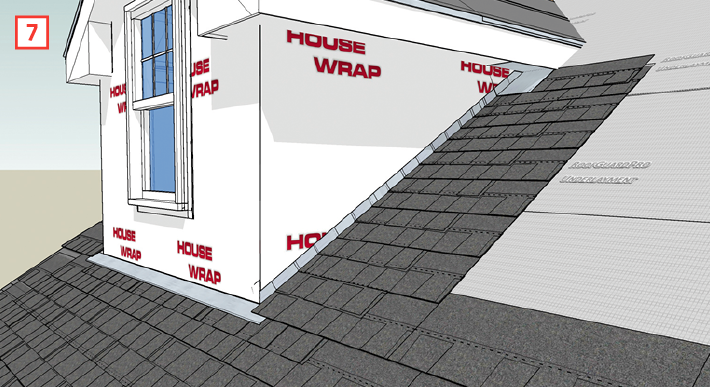
How To Flash A Dormer Pro Remodeler

Pin On Roof Details

Pin On Cool
The sketch above illustrates the end profile of roof drip edge flashing and shows its placement on the roof.
How far should flashing lay on roof.

Pin On Roof

Pin On Metal Roof
Installing Step Flashing On A Shingles Roof Youtube
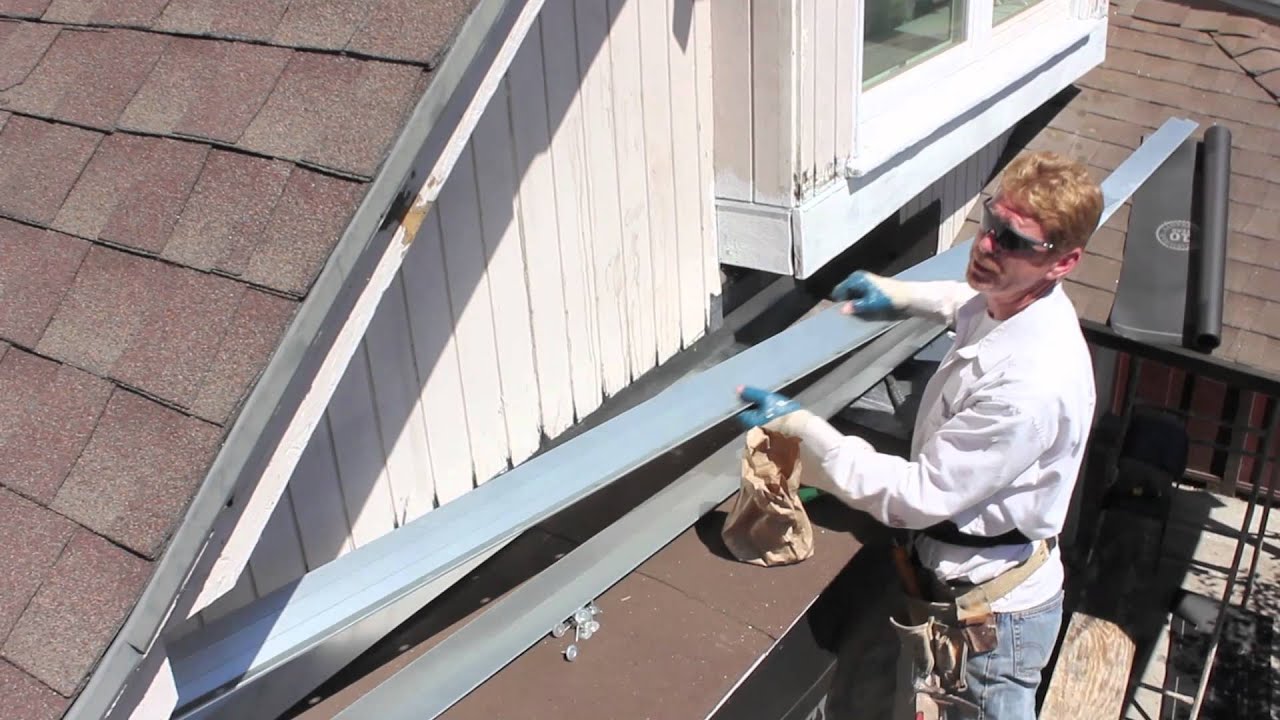
Installing Roof To Wall Flashing Youtube

Tile Sidewall Flashing Flashing Installation Matterhorn Metal Roofing Youtube

How To Fit Lead Soakers Lead Soakers For A Wall Or Chimney Stacks Youtube Slate Roof Roof Roof Plan

Tips On Removing Vinyl Siding For Attaching Ledger Board Removing Vinyl Siding Vinyl Siding Vinyl Siding Cost

Standing Seam Metal Roofing Installation Publications By New England Metal Roof Metal Roof Installation Metal Roof Roof Installation

Tips On Removing Vinyl Siding For Attaching Ledger Board Building A Deck Under Deck Ceiling Under Deck Roofing

Pin On Wood Road

Pin On 601 Outside
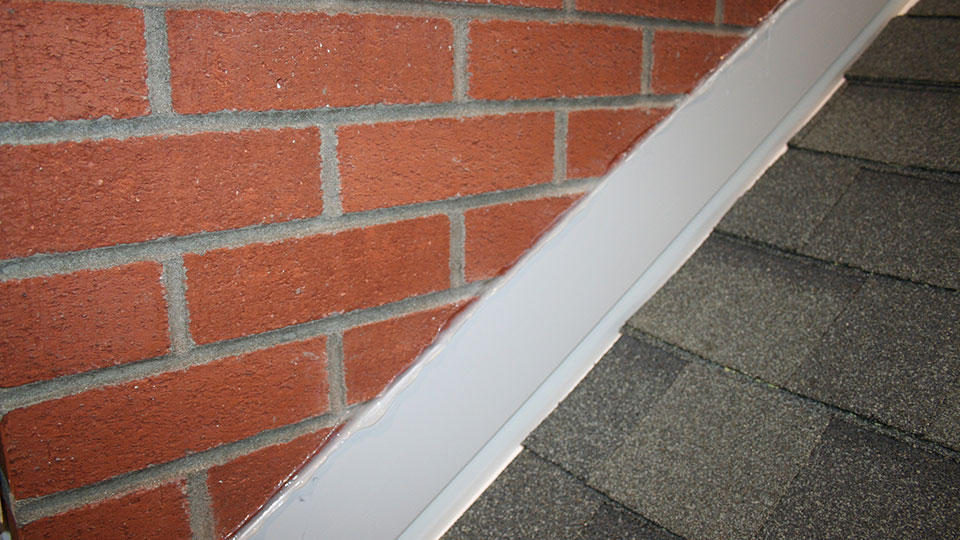
Roof Flashing To A Wall

Making A Skylight Leakproof Skylight Roof Repair Green Roof

Pin On Breezeway Mudroom Rooftop Deck

How To Install Metal Roof Rake Trim For Union S Masterrib Panel Metal Roof Installation Metal Roof Houses Roof Installation

Pin On Home Building Repair Or Rebuild
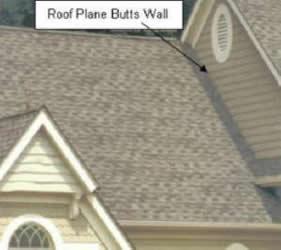
Flashing Roof Wall Intersections

Pin On Flashing
Https Encrypted Tbn0 Gstatic Com Images Q Tbn 3aand9gcthk Radxm Tk9mzfeyuebbcb2ixkn Qb9tqeefvpnyzzhcgtfz Usqp Cau

Pin On Roof

How To Re Shingle A Roof And Not Die Diy Roofing Roofing Home Improvement Projects

Pin On Roof

Chimney Cricket A Small Ridge Shaped Piece Placed Between The Roof And Chimney To Direct Water Out From Behind The Chim House Front Porch Roof Repair Roofing

Skylights In Metal Roof Fibreglass Roof Metal Roof Aluminum Roof
Source : pinterest.com
